A starter guide on designing for additive manufacturing


Additive manufacturing is for every one. Not just big companies.
Are additive manufacturing methods meant only for high end product companies like large aerospace, automotive or medical devices companies and/or hobbyists? NOT ANY MORE. It is getting to be more mainstream in almost all industries regardless of complexity, sophistication, segment or size.
Why is it that some industries are benefitting more from additive manufacturing than others? One big reason is that they have learnt the lessons to design differently for 3D printing. Here we will talk about how product designing processes have to be different.
The set of “Design Principles” traditionally used must be revisited to take full advantage of additive manufacturing/3D printing.
Traditional design principles will not work with 3DP
The following traditional design principles will not apply when you are designing to leverage 3D printing.
- Existing designs can be tried for additive manufacturing effectiveness. This approach is most likely to fail because existing design was designed for traditional manufacturing methods.
- Avoid complex shapes in products; use simple geometries for DFM considerations.
Image © Stratnel Technologies LLP

- Doing multiple iterations to optimize design is very time consuming and expensive in traditional manufacturing.
- Since additive manufacturing does not involve expensive tooling for making the part you could run iterations to optimize your design within a short span, compared to traditional methods
- Using multiple materials in one part is almost impossible without very complex manufacturing and/or assembly methods.
- Standard parts are better than custom parts for subtractive manufacturing. In additive manufacturing, parts are made anew every time. There is no such thing as a 3D printed standard part.
- Additive manufacturing aficionados have to give up their fixation on materials. They cannot afford to have statements such as “all our parts have to be in aluminium only”. Additive manufacturing can come up with high rigidity by using composites. Carbon fiber reinforcement is very much a reality. Open minds will pave the way not only for newer materials, but also gain weight reductions as a bonus.
- There is this standard notion that “3D printing is expensive”. It will not be expensive if we consider the total applied cost (which includes tooling costs, lead times, inventory carrying costs, factory footprint savings, productivity levels, etc).
All these may appear difficult to the uninitiated . But the benefits are substantial . Imagine the advantages of replacing an engineering process costing $800 and taking 10 days with another more elegant solution that costs only $200 and takes only 2 days. If such economies are in fact realisable, how many different processes in your work place could you deploy additive manufacturing to gain competitive advantage?
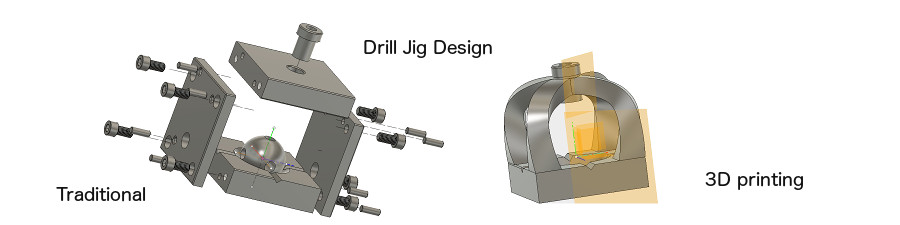
Let us talk specifics. Here is a design example to understand this better. Consider a drill jig for drilling axial holes in a spherical object in all the three axes. The idea here is that one first drills a hole by centering the sphere in a conical locator and locates the first drilled hole on two pins resting on the V block and repeat the same exercise on another orientation for the third axis.

Image © Stratnel Technologies LLP
A traditionally made and assembled Jig may look like this. This design is a representative of the idea and will need some more work to ensure clamping and other requirements.
Image © Stratnel Technologies LLP

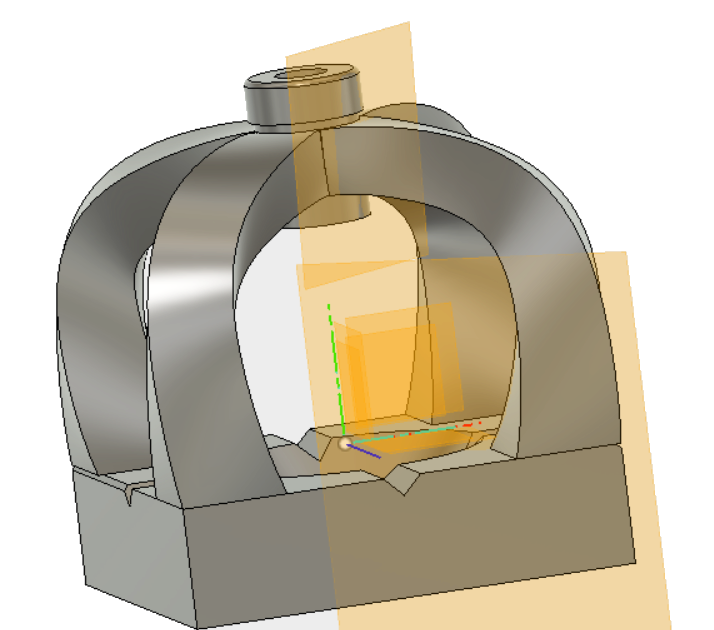
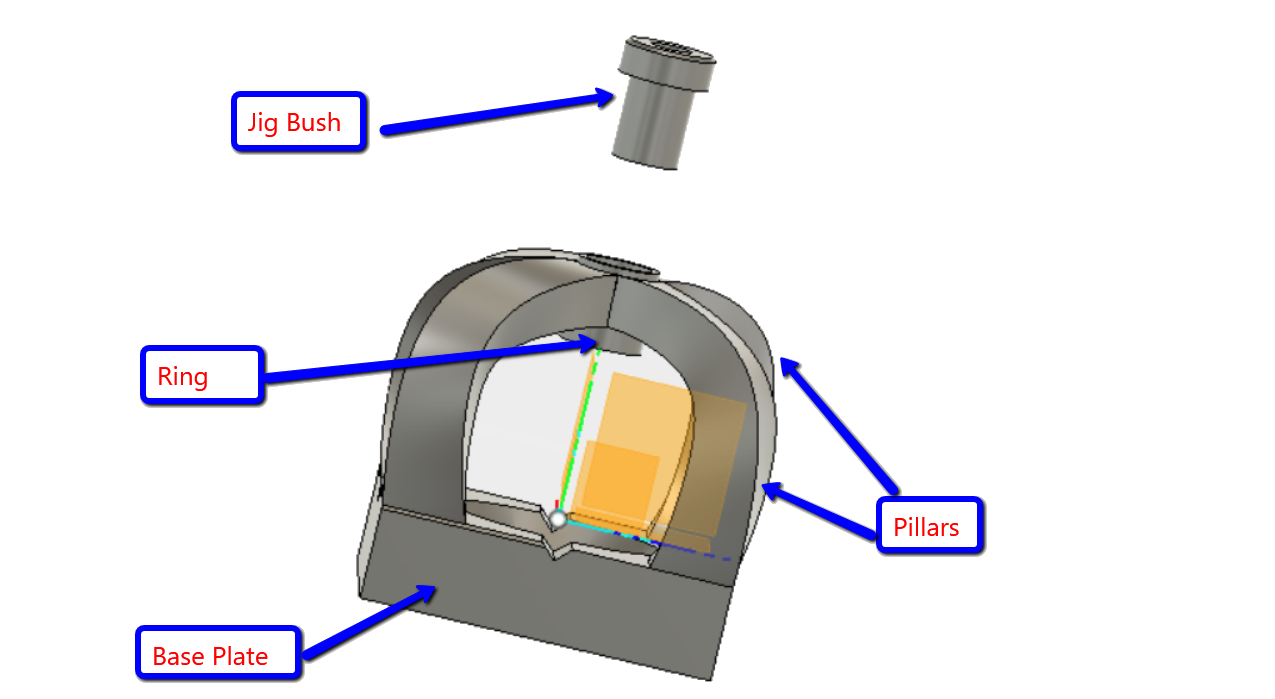
A 3D printed jig will be a lot easier to make with just two parts.
1) A structure to locate the parts , the pins and the jig bush.
2) The jig bush itself.
Image © Stratnel Technologies LLP
Design steps for Additive Manufacturing
The design steps in Fusion 360 will be:
- Create the base with the conical locator and the V groove for the pins. And locate the bush at the correct position. Generate a ring body around the bush to house the bush.
Image © Stratnel Technologies LLP

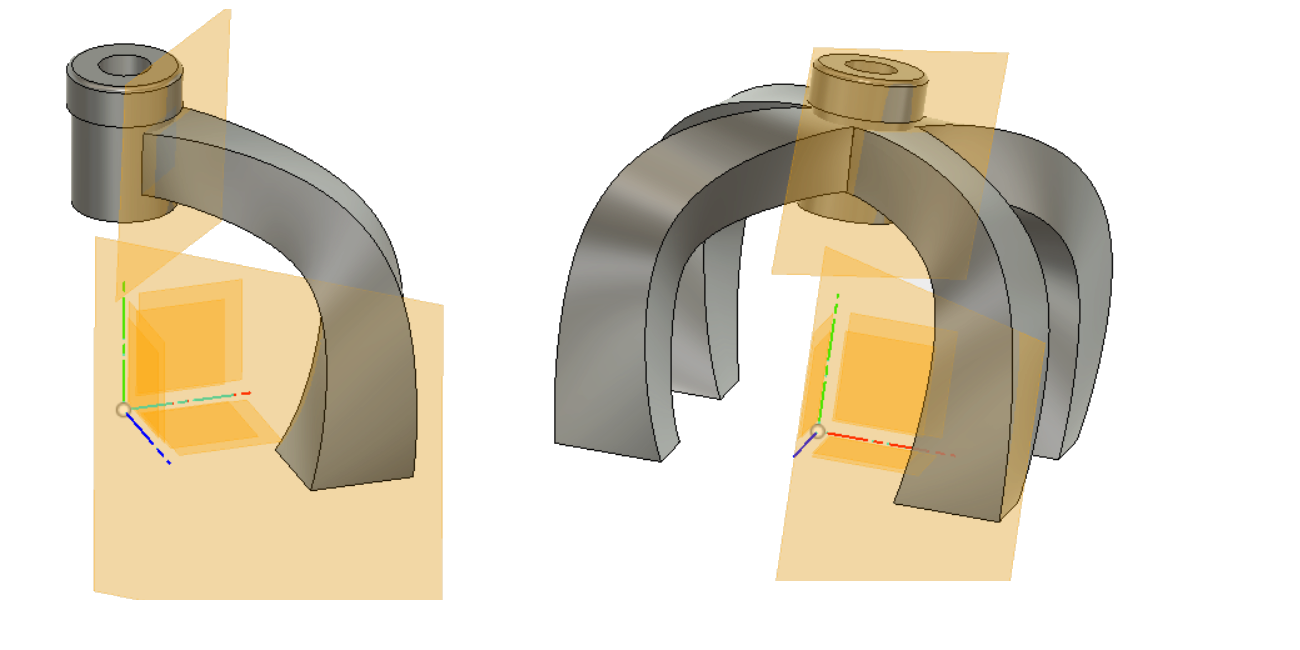
- Generate the starting area of the pillars on the top surface of the base plate. Generate a plane normal to the base and at 45 deg to the edge of the plate where you can draw the spline path for the pillar . Create a plane normal to the spline path at the end of the spline close to the jig bush.
Image © Stratnel Technologies LLP

- You can generate a new body by lofting the starting area of the pillars and the profile at the termination end, along the spline path to create a new body. Generate a circular pattern of the new body to get the four pillars.
Image © Stratnel Technologies LLP
- Combine the bodies – the base plate, the ring around the jig bush and the pillars to get one body and convert to a component and the job is done.

Image © Stratnel Technologies LLP
Shift in design paradigm for 3D printing
Designers have to be innovative and think out of the box when designing for 3D printing. This is new learning and challenges the traditional concepts learnt so far by designers. Of course, additive manufacturing does challenge traditional manufacturing and designers have to make suitable changes in their thinking in order to be successful.
K. Padmanabhan
CEO & Founder. Mechanical engineer with PG in Tool Design and Manufacturing; Varied experience in global companies; CEO of MNC for over 17 years; Strong process background.